Vue.js is the new trending framework in the Javascript front-end world, and its simplicity lets you build web applications pretty fast. The structure of a Vue.js application is very similar to an Angular application as it uses components and templates to build pages. This video is an excellent introduction to start playing with Vue.js especially if you have not used Angular or React.
Here is a size comparison (minified) of the current popular frameworks (more details here):
| Name                     | Size  |
| ------------------------ | ----- |
| Angular 2                | 566K  |
| Ember 2.2.0              | 435K  |
| React 0.14.5 + React DOM | 133K  |
| React 16.2.0 + React DOM |  97K  |
| Vue 2.4.2                |  58K  |
| Inferno 1.2.2            |  48K  |
| Preact 7.2.0             |  16K  |
As I said before, the simplicity of Vue.js makes it very lightweight and easy to integrate with other libraries or existing projects. On the other hand, Vue.js is capable of building robust Single-Page Applications with the right tools and JHipster is the perfect match for that. If you're not familiar with JHipster, I recommend watching this video that will give you a good introduction on what you can do with JHipster.
Vue.js using a JHipster blueprint
By default, JHipster asks you to choose between Angular or React for the front-end framework. The concept of the blueprint was introduced in JHipster version 5, and the goal is to extend the functionality of JHipster by letting you use your own sub-generator. More information on how to create and use a blueprint can be found in the documentation.
Installation
The official Vue.js blueprint is used to generate the front-end. You can follow the installation instruction on the blueprint repository. Since the blueprint was still in development when I wrote this blog post, you may encounter some issues. Feel free to report them and submit a Pull Request if you think that a part was done the wrong way.
Application generation
Let's start by creating a new folder and run JHipster with the vuejs blueprint:
mkdir vuejs-app
cd vuejs-app
jhipster --blueprint vuejs
The default answers can be selected for each questions and if the blueprint is correctly installed you should see this message:

This .yo-rc.json can be used in case you want to generate the same application referenced in this article. The file is placed in the application directory and then running jhipster -d --blueprint vuejs will generate the application without asking any questions.
Entities generation
Before starting the application, let's generate a few entities using a simple JDL that contains three entities. Simply create a file named entities.jdl in the root folder of the application with this content. Then run the jhipster import-jdl entities.jdl command to generate the entities using the Vue.js blueprint.
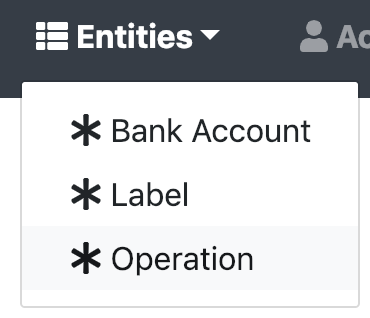
You can make sure that everything is working by running the ./mvnw command to start the application and then visiting http://localhost:8080/#/. After logging in, the "entities" menu should have the three entities like below:

Deep dive in the Vue.js structure
The folder containing the whole Vue.js application is src/main/webapp/app, and the structure is very similar to Angular. I recommend having the command npm start running in your terminal to enjoy the benefits of live compiling/reloading when you do any code changes. Like Angular and React, webpack is used to compile TypeScript code into JavaScript and package the application.
Configuration
Core
The Vue instance is created in the file src/main/webapp/app/main.ts, and I recommend looking at src/main/webapp/app/shared/config/config.ts as well.
Both files configure multiple things:
- i18n
- Router
- Vuex (used to store your application state)
- Service (custom services must be added here so they can be injected)
i18n
The Vue.js application is already configured to work with many different languages and the folder containing the translations can be found at src/main/webapp/i18n. The method $t() can then be used to display text based on the user's language.
In a template:
<h1 class="display-4" v-text="$t('home.title')">Welcome, Java Hipster!</h1>
In a component (name parameters can be used):
// "A Operation is updated with identifier {{ param }}"
const message = this.$t('blogpostApp.operation.updated', { param: param.id });
Routes
Like React, all the routes are centralized in one file: src/main/webapp/app/router/index.ts and JHipster will automatically generate the routes for your entities.
Custom routes should be added after the comment // jhipster-needle-add-entity-to-router - JHipster will add entities to the router here so it does not break things when other entities are generated.
The field meta is used for checking user's authorities and it can be used to pass other variables:
// This route will only allow users with the "ROLE_ADMIN" authority
{
  path: '/admin/user-management',
  name: 'JhiUser',
  component: JhiUserManagementComponent,
  meta: { authorities: ['ROLE_ADMIN'] }
}
Entities pages
Structure
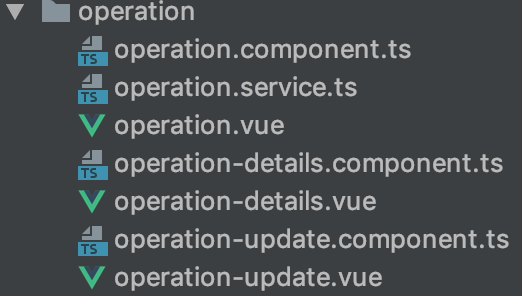
The folder src/main/webapp/app/shared/model contains the models and like in Angular. There is a component associated with a .vue template for each "page" of the application.

I recommend creating a custom service/component/template when creating a new page, so you don't have to resolve conflicts when re-generating an entity.
Validation
The validation is done using the vuelidate library, and the usage is straightforward. The entity Operation is a good example to understand how the custom validation is done with vuelidate. The OperationUpdate component contains the validations options as you can see below:
const validations: any = {
  operation: {
    date: {
      required
    },
    description: {},
    amount: {
      required,
      numeric
    }
  }
};

@Component({
  validations
})
export default class OperationUpdate extends Vue {
    ...

}
The file operation-update.vue uses the validation rules to show/hide custom validation messages:
<input type="number" class="form-control" name="amount" id="operation-amount"
    :class="{'valid': !$v.operation.amount.$invalid, 'invalid': $v.operation.amount.$invalid }" v-model="$v.operation.amount.$model"  required/>
<div v-if="$v.operation.amount.$anyDirty && $v.operation.amount.$invalid">
    <small class="form-text text-danger" v-if="!$v.operation.amount.required" v-text="$t('entity.validation.required')">
        This field is required.
    </small>
    <small class="form-text text-danger" v-if="!$v.operation.amount.number" v-text="$t('entity.validation.number')">
        This field should be a number.
    </small>
</div>
The important object is $v and it can be used to get the status of any validated field.
Conclusion
Vue.js has a smooth learning curve and the time required to be productive is very short. It is an excellent alternative to Angular/React and having experience in those frameworks will help. The comparison with other frameworks page will help you decide if Vue.js is a good fit for your application.
JHipster will provide everything you need to start a complete modern Web app and take it to production in a very short amount of time. On top of that, the back-end is built as a high-performance and robust Java stack with Spring Boot.
If something in this article piqued your interest and you would like more information on JHipster or the services we offer at Ippon USA we’d love to hear from you! Please contact us at contact@ippon.tech with your questions and inquiries.


