A few months into the pandemic, my parents' church approached me to modernize their website. With lockdown and restrictions on gatherings, the church had started relying more on live streams and posting sermons on their website. Consequently, the website was getting more traffic and increased attention. Members noted that the user experience was not particularly good.
In this blog post I will walk through the steps that I took and some of the decisions I made while converting the outdated Wordpress website to a Jamstack powered website that is modern, responsive, and best of all free!
Since this was a project aimed at improving the current experience without a lot of restrictions, I decided to have fun with it and took this as a learning opportunity to use some services and technologies that were newer to me.
Technologies Used
- Next.js - React framework for building static and hybrid sites.
- TinaCMS - Customizable visual editor for your site. It is a CMS without a lot of the overhead of a traditional one.
- Vercel - Zero config deployments of Next.js applications.
- DataStax Astra - Cassandra database without all the configuration overhead.
- SendGrid - Email delivery service.
- EasyCron - Feature packed cron job runner.
Where To Start?
I started by going through the existing site categorizing and mapping content, images, and other stylistic details for each page. Pretty early on it became apparent that there was a lot of duplicate content and that I could trim down the number of pages. Once I determined which pages I would use I ended up creating my Next.js app with TinaCMS using their guide to get a basic framework setup.
TinaCMS allows for real-time editing of your site and gives you the ability to use Markdown or JSON to drive the static content on your pages. The static content for your site is then stored in Github and when you make a change it is just a commit to your repo. It allows for users to create branches from within the browser so changes can go to a branch and be reviewed before being published.
I went with Next.js and TinaCMS instead of a traditional CMS is because I wanted full control of the code and the potential to use more modern frameworks.
Next.js gives you the ability to fetch data for static generation using getStaticProps. This is where you define the static content that you want your page to use and what the TinaCMS form will use.
export const getStaticProps = async ({ preview, previewData }) => {
  if (preview) {
    return getGithubPreviewProps({
      ...previewData,
      fileRelativePath: "content/im-new.json",
      parse: parseJson,
    });
  }
  return {
    props: {
      sourceProvider: null,
      error: null,
      preview: false,
      file: {
        fileRelativePath: "content/im-new.json",
        data: (await import("../content/im-new.json")).default,
      },
    },
  };
};
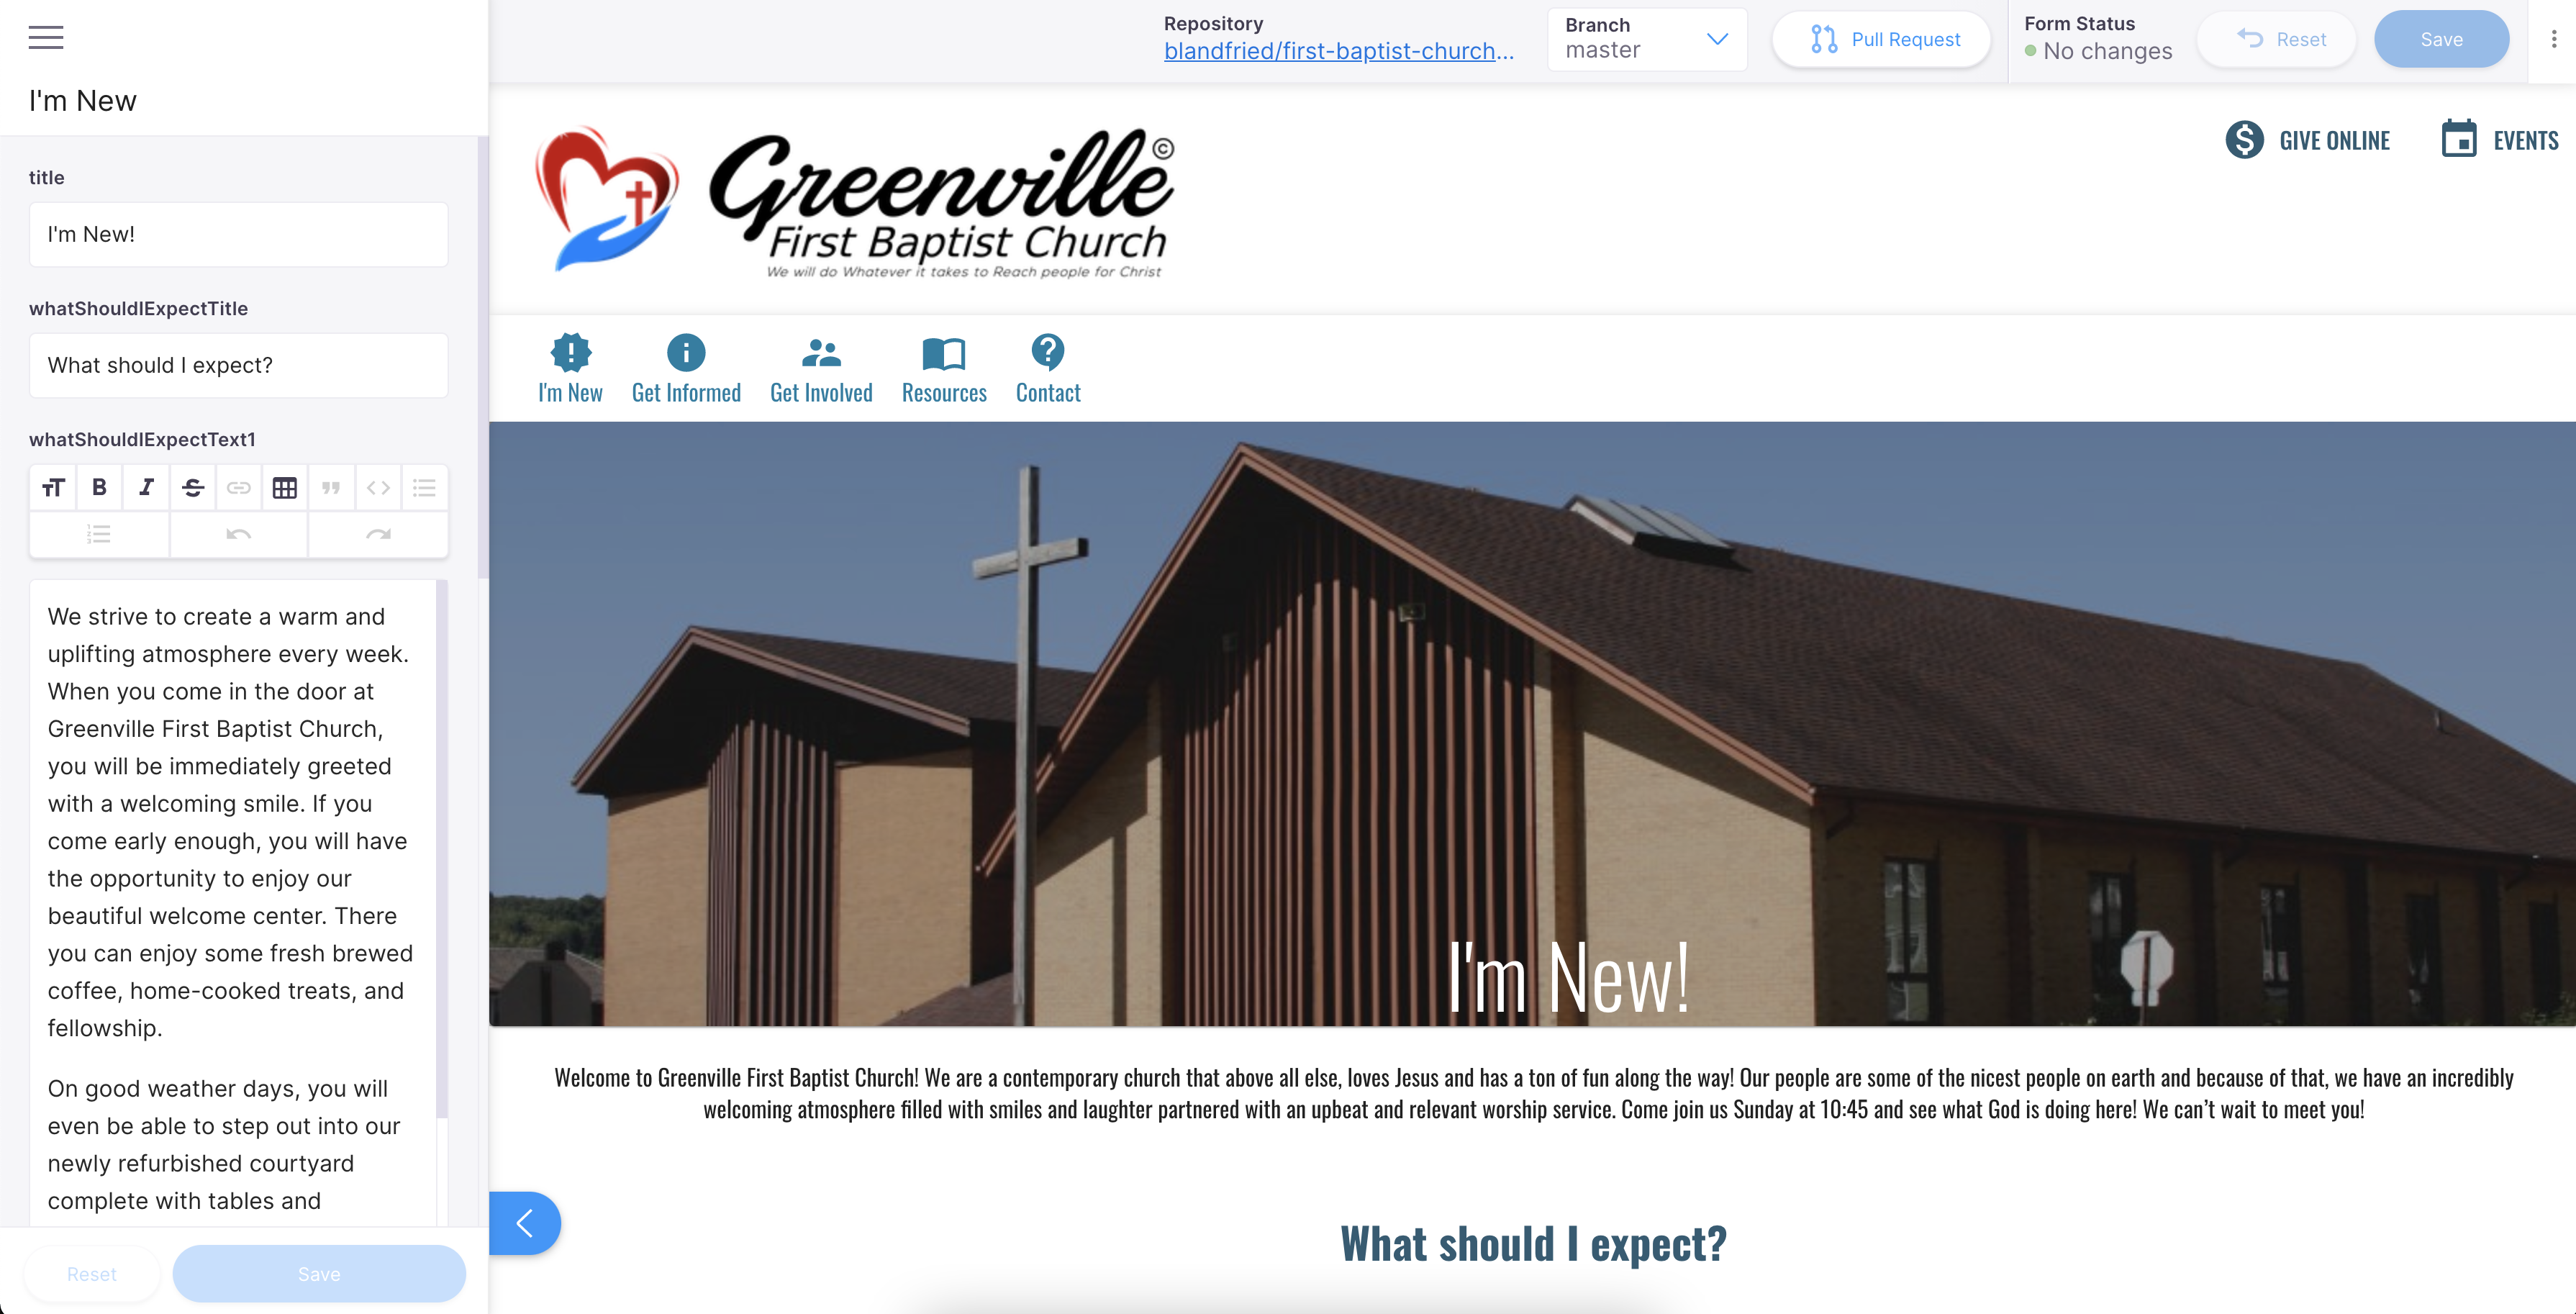
This allows you to use file.data in your component along with the TinaCMS form React hook to link your static content with the TinaCMS editor which looks like the image below.

Automating Sermon Videos
On the Wordpress site, the church had to manually update the sermon video page every Monday with the latest sermon recording. I determined that this should be an automated task; one less thing for them to worry about. I accomplished this automation by using the serverless function capabilities that come with using Next.js and hosting it using Vercel. I wrote a Node.js function that calls the YouTube API to retrieve the five latest uploads. To save on API call quotas, I stored the response data in a database. Since new sermons are uploaded on Sundays and only change weekly, I figured there was no need to call the YouTube API anytime someone visited the site.
I set up a cron job using EasyCron that runs on Sunday mornings when the sermons begin, and calls the YouTube API that I created to fetch the latest videos. Since they have a live stream, I display the live stream on their watch page and give an snackbar alert that a they can "Watch Live" so members do not have to go to YouTube to view the sermons and can watch on the website directly.
I originally went with Github Actions but I found it to be very unreliable with running at the correct time. I was making the API calls manually every Sunday until I found EasyCron. They have an integration with Vercel that made it easy to hook up with the site.
Database
I wanted to learn about Cassandra and document style databases so I signed up for the new DataStax Astra Serveless database. This is probably overkill and I could have gone with something simpler, but I wanted to learn from this experience so I chose something unfamiliar and interesting. With this approach, when someone visits the website it makes a call to the database and retrieves the video data from there instead of YouTube API.
Node.js API
const { createClient } = require("@astrajs/collections");

export default async (_req, res) => {
  // create an Astra client
  const astraClient = await createClient({
    astraDatabaseId: process.env.ASTRA_DB_ID,
    astraDatabaseRegion: process.env.ASTRA_DB_REGION,
    applicationToken: process.env.ASTRA_DB_APPLICATION_TOKEN,
  });
  const videoCollection = astraClient
    .namespace(process.env.ASTRA_DB_KEYSPACE)
    .collection(process.env.VIDEOS_COLLECTION);
  const vids = await videoCollection.find({});

  res.status(200);
  res.send(JSON.stringify(vids));
};
With the new serverless database that they offer it allows me to have a database for the church's website and costs nothing. DataStax gives you $25 monthly credit and since the storage and read/writes are so low right now that the monthly credit covers it.
Contact Us
On the old site, their "Contact Us" form was no longer working, and they wanted to have that feature functioning. I created a simple form and added a Google Captcha to it in an attempt to cut down on spam. I was unsure how to send the form responses. If this had been hosted on a traditional hosting platform, I would have just used PHP to send the responses.
Since I am using serverless functions and Node.js I had to take a different approach. I signed up for an account on SendGrid because they have a very generous free tier and I then used nodemailer to send the emails. Once I signed up on SendGrid and got the SMTP settings it was pretty straightforward. The contact form calls the API I created and then that creates the email based on the template I defined and sends it to the church's inbox.
Mail API
const nodemailer = require("nodemailer");

// async..await is not allowed in global scope, must use a wrapper
export default async (_req, res) => {
  const req = _req.body;

  // create reusable transporter object using the default SMTP transport
  const transporter = nodemailer.createTransport({
    host: "smtp.sendgrid.net",
    port: 587,
    secure: false, // true for 465, false for other ports
    auth: {
      user: "apikey",
      pass: process.env.SMTP_API,
    },
  });

  // send mail with defined transport object
  const info = await transporter.sendMail({
    from: process.env.SMTP_FROM, // sender address
    to: process.env.SMTP_TO, // list of receivers
    subject: req.subject, // Subject line
    html: `<p><strong>Name:</strong> ${req.name}</p><p><strong>Email:</strong> ${req.email}</p><p><strong>Message:</strong> ${req.message}</p>`, // html body
  });

  if (info.response.includes("250 Ok")) {
    res.status(200);
    res.send(info.messageId);
  } else {
    res.status(500);
    res.send("Error Sending Message");
  }
};
Conclusion
Overall, this was a fun and, at times, challenging side project. I was able to explore some modern technologies while also saving my parents' church some yearly expenses by replacing their old Wordpress site. Updating the website also gave the church the opportunity to reevaluate their logo and color scheme. It was fun to be part of this transformation and see everything come together. When taking on this project, I wanted to make sure I did not add any expenses for the church. I was able to accomplish this because most of the services I chose offer free tiers (that this particular use case fell in) or offered credits like DataStax does. So instead of paying someone around $200/year for their old website, they will now only have to pay for their domain renewal every few years.
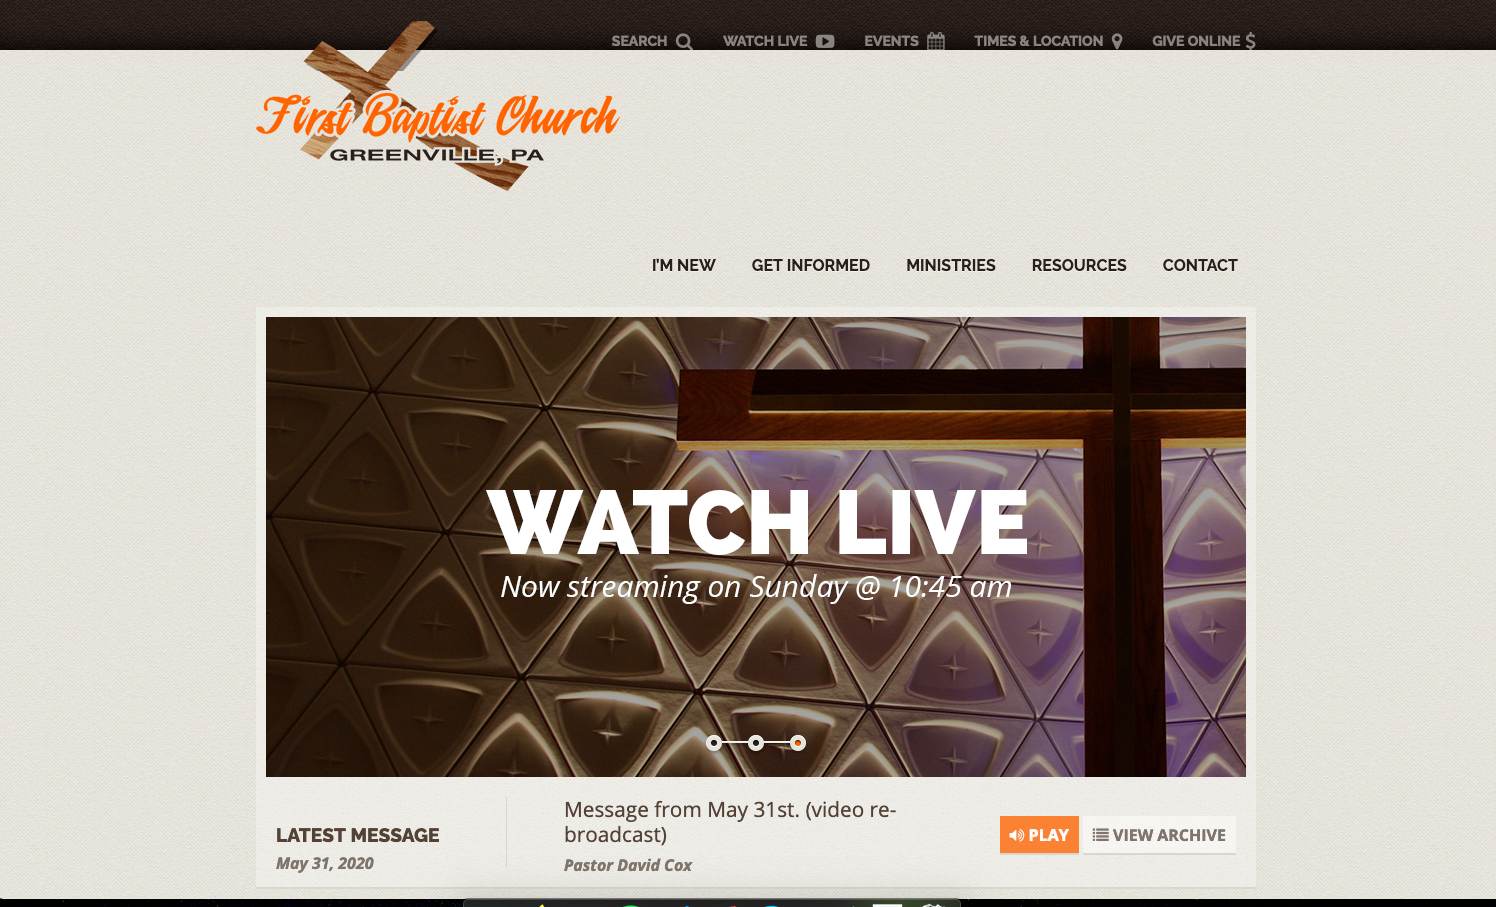
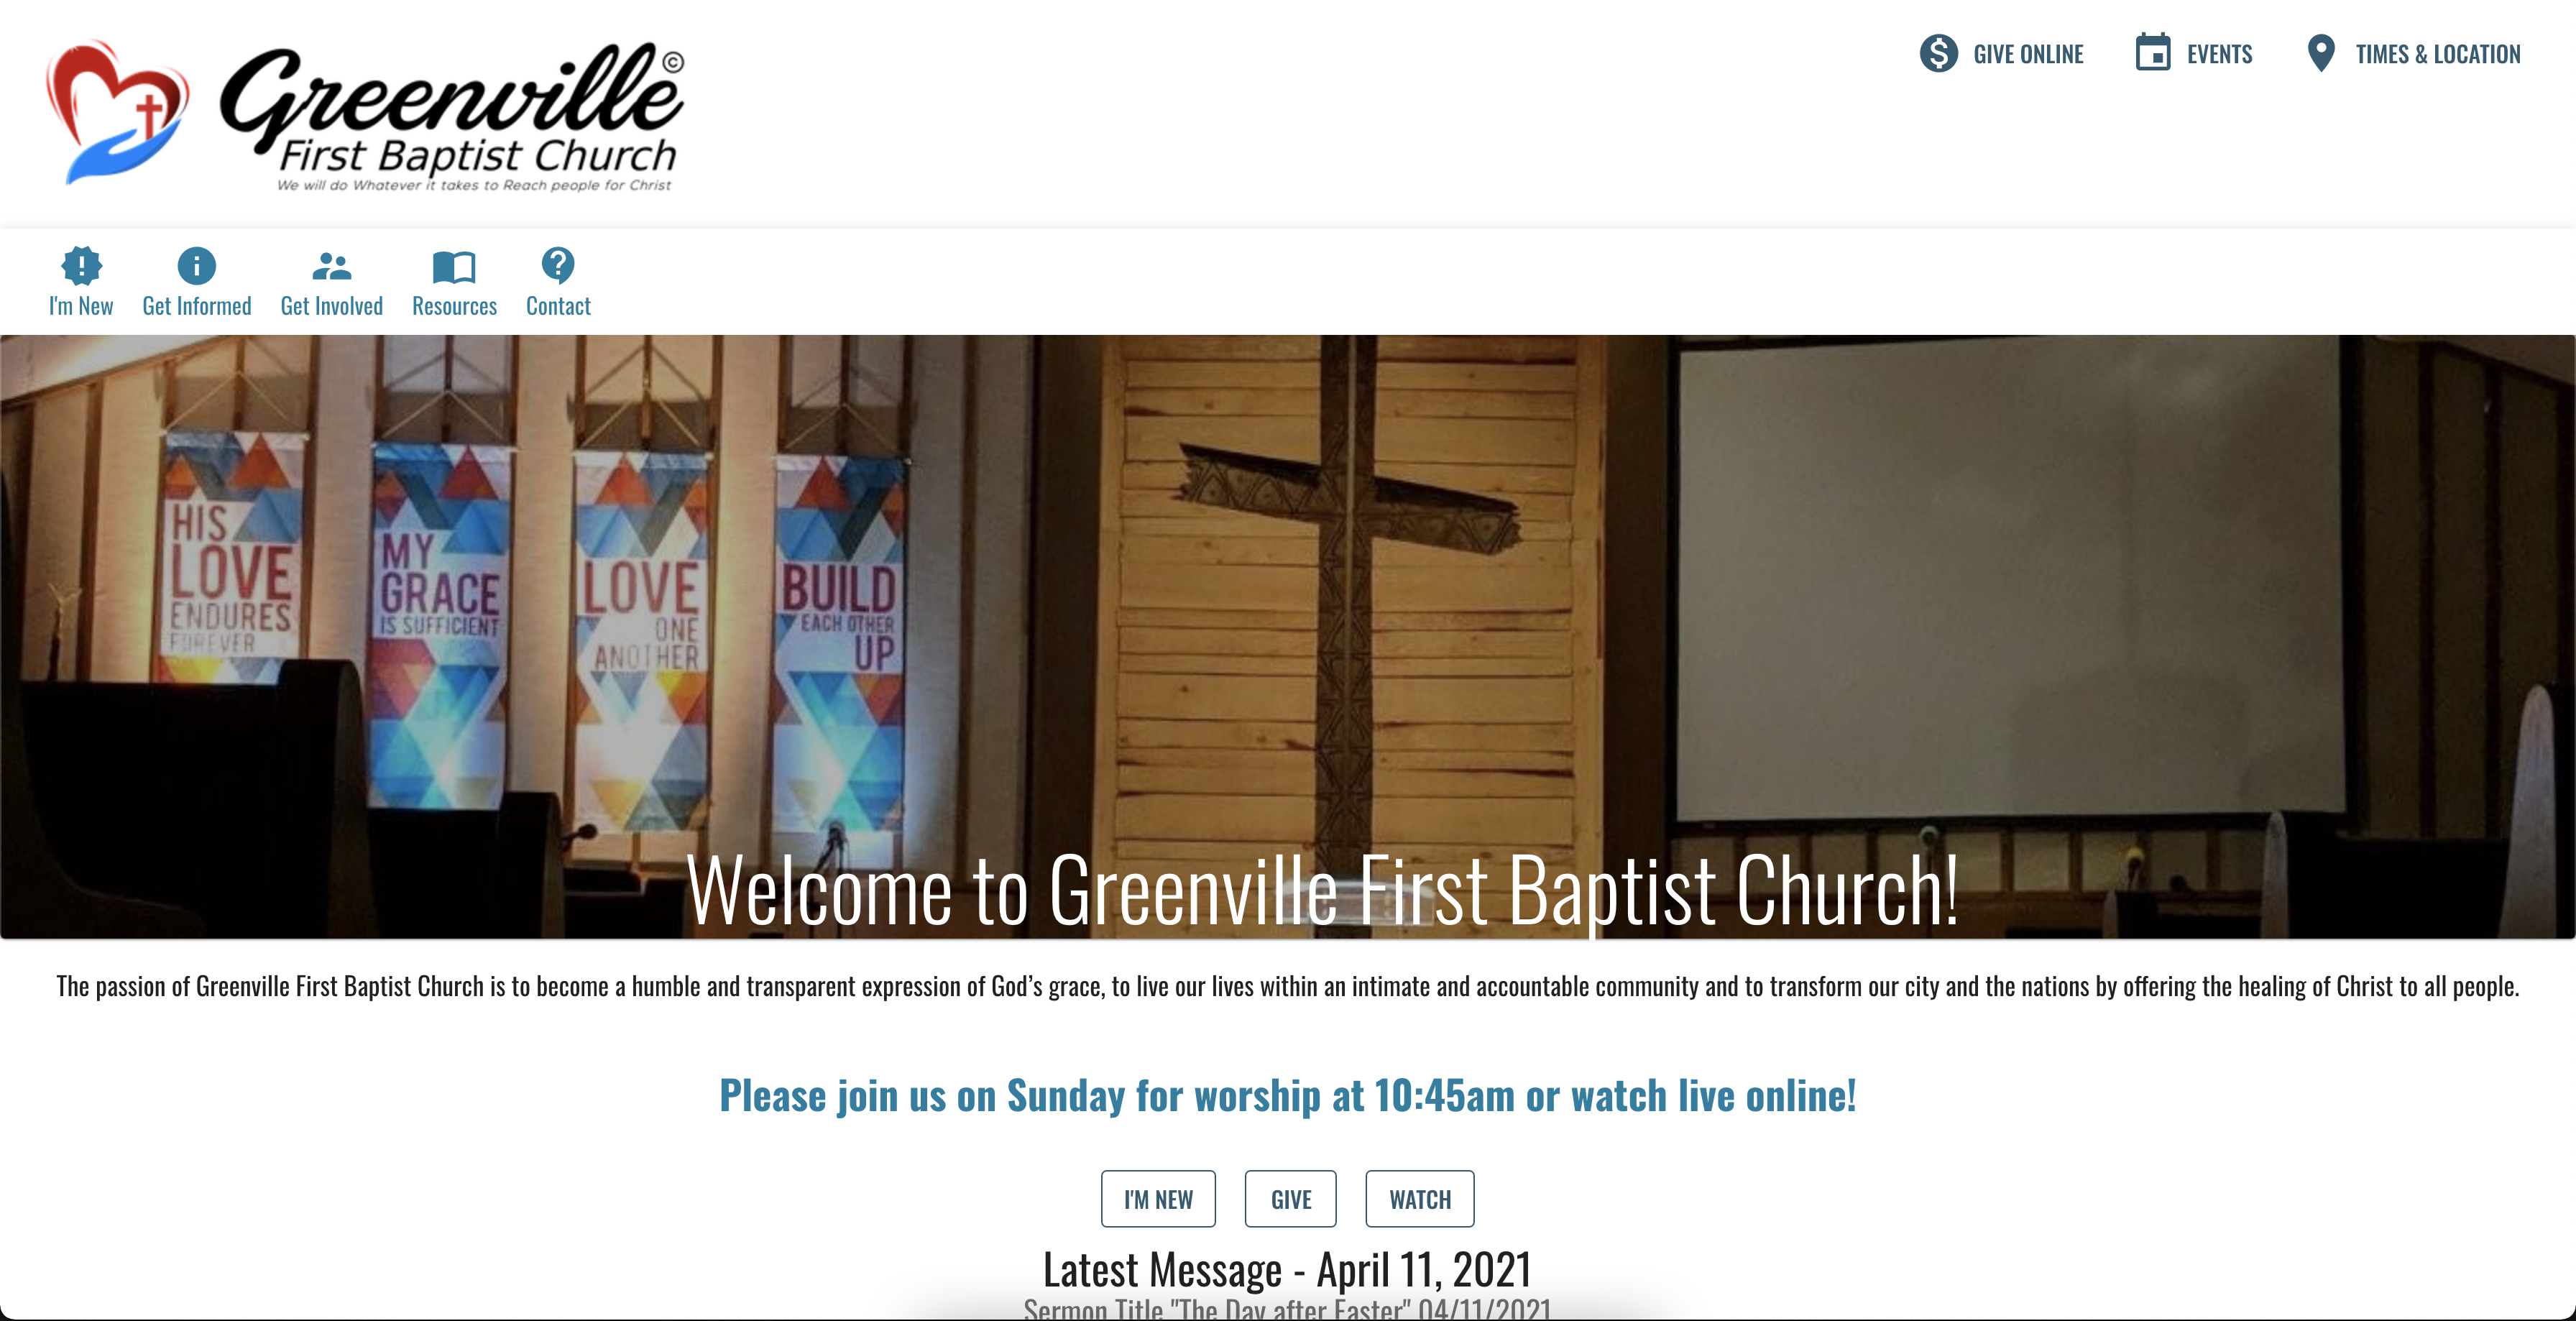
Check out some before and after screenshots below of the home page.
Before

After


