Apache Flink is one of the latest distributed Big Data frameworks with a goal of replacing Hadoop's MapReduce. Apache Spark is "very" similar to Flink but where Flink shines is by being able to process streams of data in real time. Spark, on the other hand, can only do batch processing and lacks stream processing capabilities. Real time data streaming is now basically everywhere and a lot of companies are upgrading their existing infrastructure to support it. If you are looking to stream data or simply want to integrate a new framework built for data streaming, Apache Flink is a real option.
In this blog post, I will explain how a local Flink cluster running on Kubernetes can be used to process data stored on Amazon S3. The data is coming from the CDC website and the goal is to join them to correlate the number of vaccine doses with COVID-19 cases/deaths. All the code used in this blog post is available at this GitHub repository.
Deployment on Kubernetes
Prerequisites
I decided to use minikube for my local Kubernetes cluster but you can also use a Cloud service like Amazon EKS or GKE. Make sure to have your kubectl configured to interact with your cluster correctly. In case of any issues, you can follow the instructions from the Flink website.
Deployment
I created all the necessary Kubernetes files in the k8s folder so you can run the command below to create the cluster:
kubectl create -f k8s
I recommand using k9s to monitor your Kubernetes pods and make sure that everything is running fine.

The last step is to grab the full name of the job manager pod and then forward the port 8081:
kubectl port-forward ${flink-jobmanager-pod} 8081:8081
http://localhost:8081 should show Flink's dashboard and I will go into details about it later in this blog.
Running a Flink job remotely
JHipster application
I need an application that will let me write a Flink job in Java and then publish it easily to my cluster without having to write bash scripts. To do that, I will use JHipster to generate a Spring Boot application with all the necessary components and a nice UI to start my Flink job.
Feel free to directly use my repository or generate the application using the file .yo-rc.json. The last thing to do is to add the correct Maven dependency in your pom.xml to have the Flink libraries available.
<dependency>
    <groupId>org.apache.flink</groupId>
    <artifactId>flink-clients_2.12</artifactId>
    <version>1.12.0</version>
</dependency>
Flink job
Here are the three sources of data to join:
- United States COVID-19 Cases and Deaths by State over Time
- COVID-19 Vaccine Distribution Allocations by Jurisdiction - Moderna
- COVID-19 Vaccine Distribution Allocations by Jurisdiction - Pfizer
The method run below is our "main" function:
public static List<VaccineStatsVM> run() throws Exception {
    // Connect to remote Flink and provide the Jar to be shipped
    ExecutionEnvironment env = ExecutionEnvironment.createRemoteEnvironment("localhost", 8081, "target/jhipster-0.0.1-SNAPSHOT.jar.original");

    // Read Moderna data
    DataSource<VaccinePojo> moderna = env
        .readCsvFile("s3a://tlebrun-playground/csv/COVID-19_Vaccine_Moderna.csv")
        .ignoreFirstLine()
        .parseQuotedStrings('"')
        .includeFields("1000001") // Fields "Jurisdiction" and "Doses allocated for distribution week of 01/04"
        .pojoType(VaccinePojo.class, "state", "allocatedDosesModerna");

    // Read Pfizer data
    DataSource<VaccinePojo> pfizer = env
        .readCsvFile("s3a://tlebrun-playground/csv/COVID-19_Vaccine_Pfizer.csv")
        .ignoreFirstLine()
        .parseQuotedStrings('"')
        .includeFields("100000001") // Fields "Jurisdiction" and "Doses allocated for distribution week of 01/04"
        .pojoType(VaccinePojo.class, "state", "allocatedDosesPfizer");

    // Read stats by state data
    DataSource<StatsByStatePojo> statsByStates = env
        .readCsvFile("s3a://tlebrun-playground/csv/COVID-19_Cases_and_Deaths_by_State.csv")
        .ignoreFirstLine()
        .parseQuotedStrings('"')
        .includeFields("11100001")
        .pojoType(StatsByStatePojo.class, "date", "state", "cases", "death");

    // Filter stats on 01/04/2021
    FilterOperator<StatsByStatePojo> dayStatsByStates = statsByStates
        .filter(statsByState -> "01/04/2021".equals(statsByState.getDate()));

    // Join the vaccine data and cases using state as key
    // Sort by number of deaths
    return moderna
        .join(pfizer)
        .where("state")
        .equalTo("state")
        .map(new MapToVaccineFunction())
        .join(dayStatsByStates)
        .where(new IdSelectorStateCode())
        .equalTo("state")
        .map(new MapToCovidFunction())
        .sortPartition(new IdSelectorDeath(), Order.DESCENDING)
        .collect();
}
Reading a CSV is pretty simple and Flink will do all the parsing for you. Manipulating each DataSource is also pretty easy and operations like filtering/mapping can done directly on the data. The COVID-19 cases/deaths data source is filtered to only keep the values for the date 01/04/2021 since we are using the vaccine data for this date too.
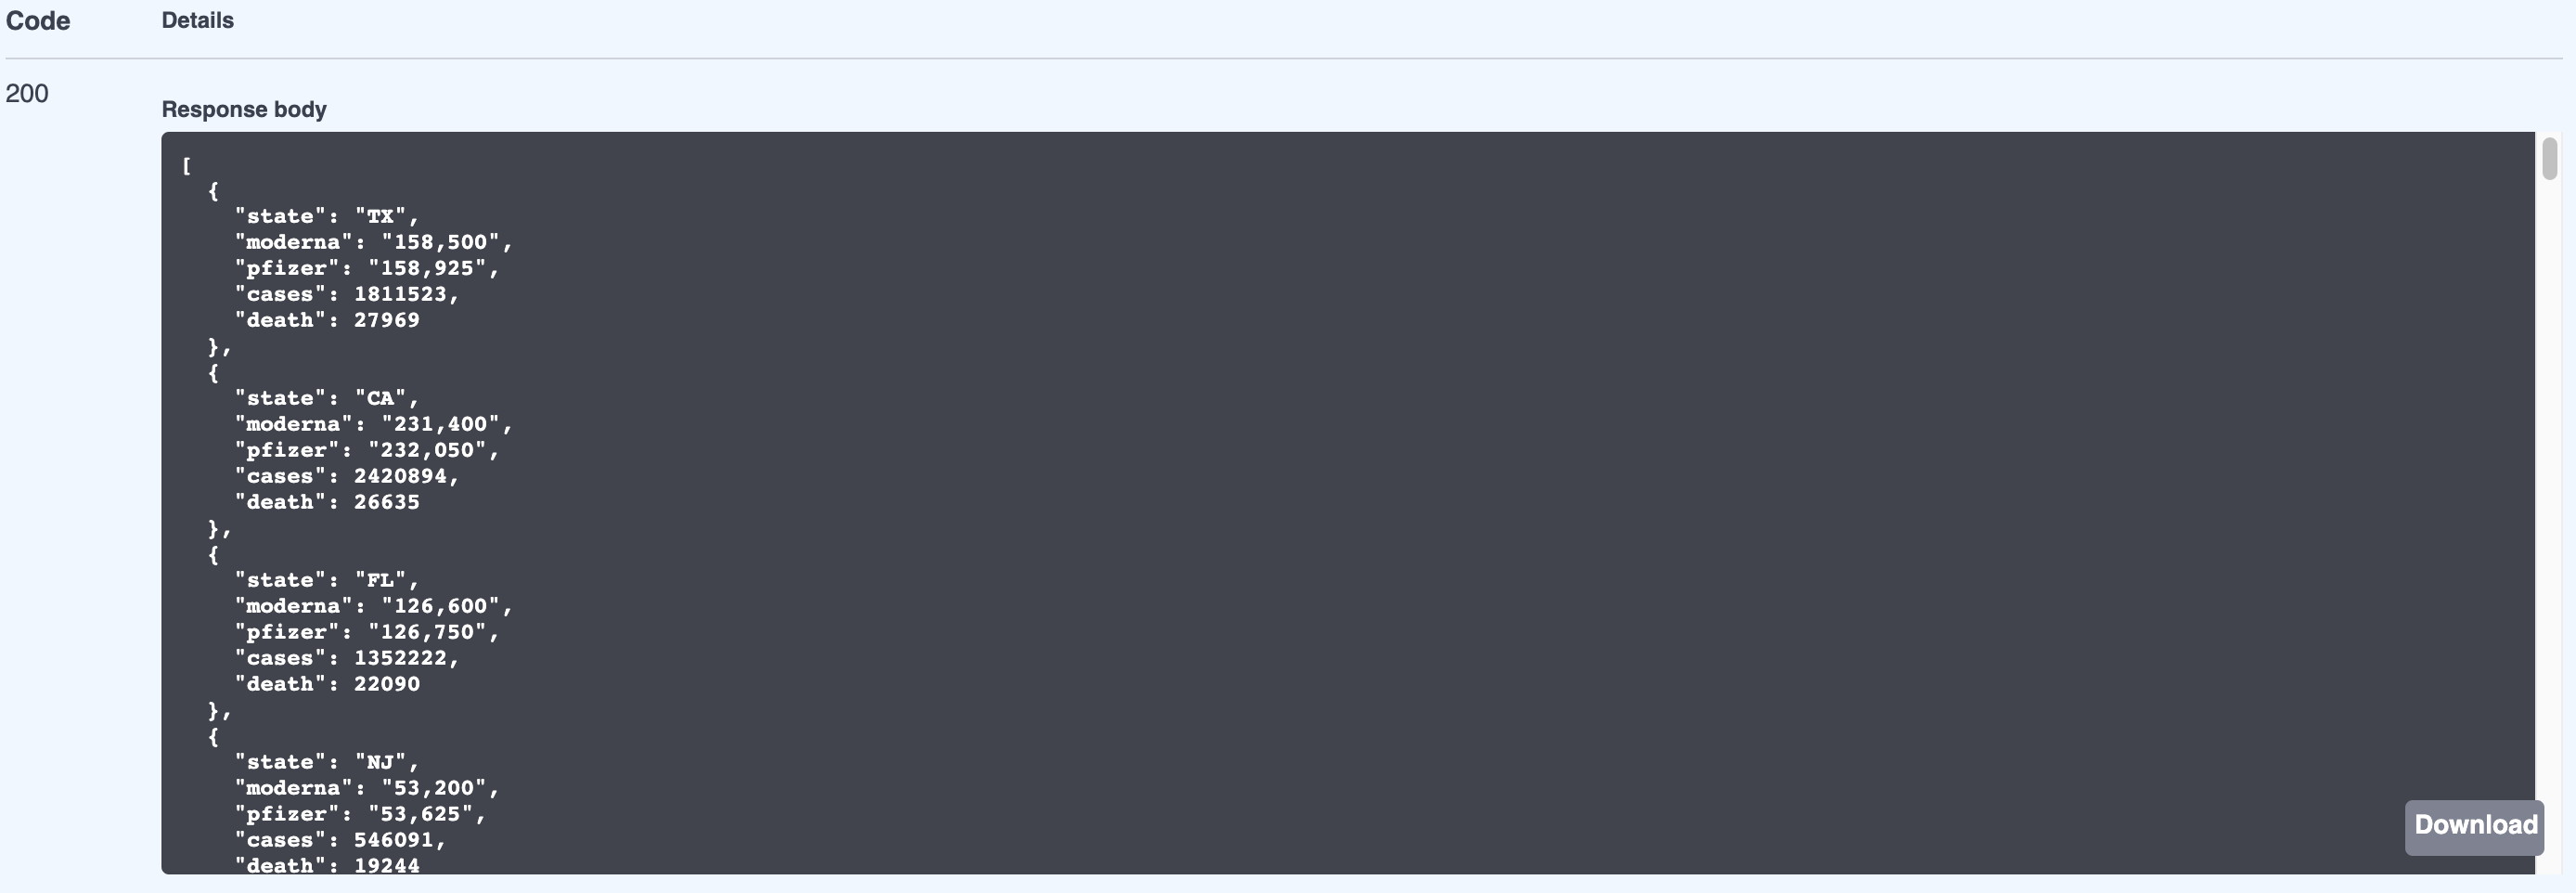
Once we have all the correct data, it can be joined using the state as the joining key. IdSelectorStateCode takes care of converting a state name to its code so it correctly matches. After the joins, everything is mapped to one final POJO VaccineStatsVM containing the fields below:
private String state;
private String moderna;
private String pfizer;
private Long cases;
private Long death;
Finally, the list is sorted by the number of death and the result is collected into a regular List. Because of the collect(), there is no need to call env.execute() which is usually required since all Flink operations are executed lazily.
Result and future work
To trigger the job, we need to create an API endpoint in the JHipster application so it is available in the Swagger UI:
@RestController
@RequestMapping("/api")
public class CovidResource {

    @GetMapping("/covid")
    public ResponseEntity<List<VaccineStatsVM>> getVaccineStats() throws Exception {
        return ResponseEntity.ok(FlinkJob.run());
    }

}
Now we can compile and start our JHipster application:
# Compile the application and the job
./mvnw clean verify

# Start the application
./mvnw
Browse to http://localhost:8080 and then login using the credentials admin/admin. Using the top menu, navigate to Administration -> API and you should see the resource covid-resource:

After clicking on Execute, the job will be triggered and you will see the result after few seconds:

Future work would be to build a small UI to show the results in a chart rather than just json. Also, it should be possible to pick the date and the field to sort on.
Job manager’s web UI
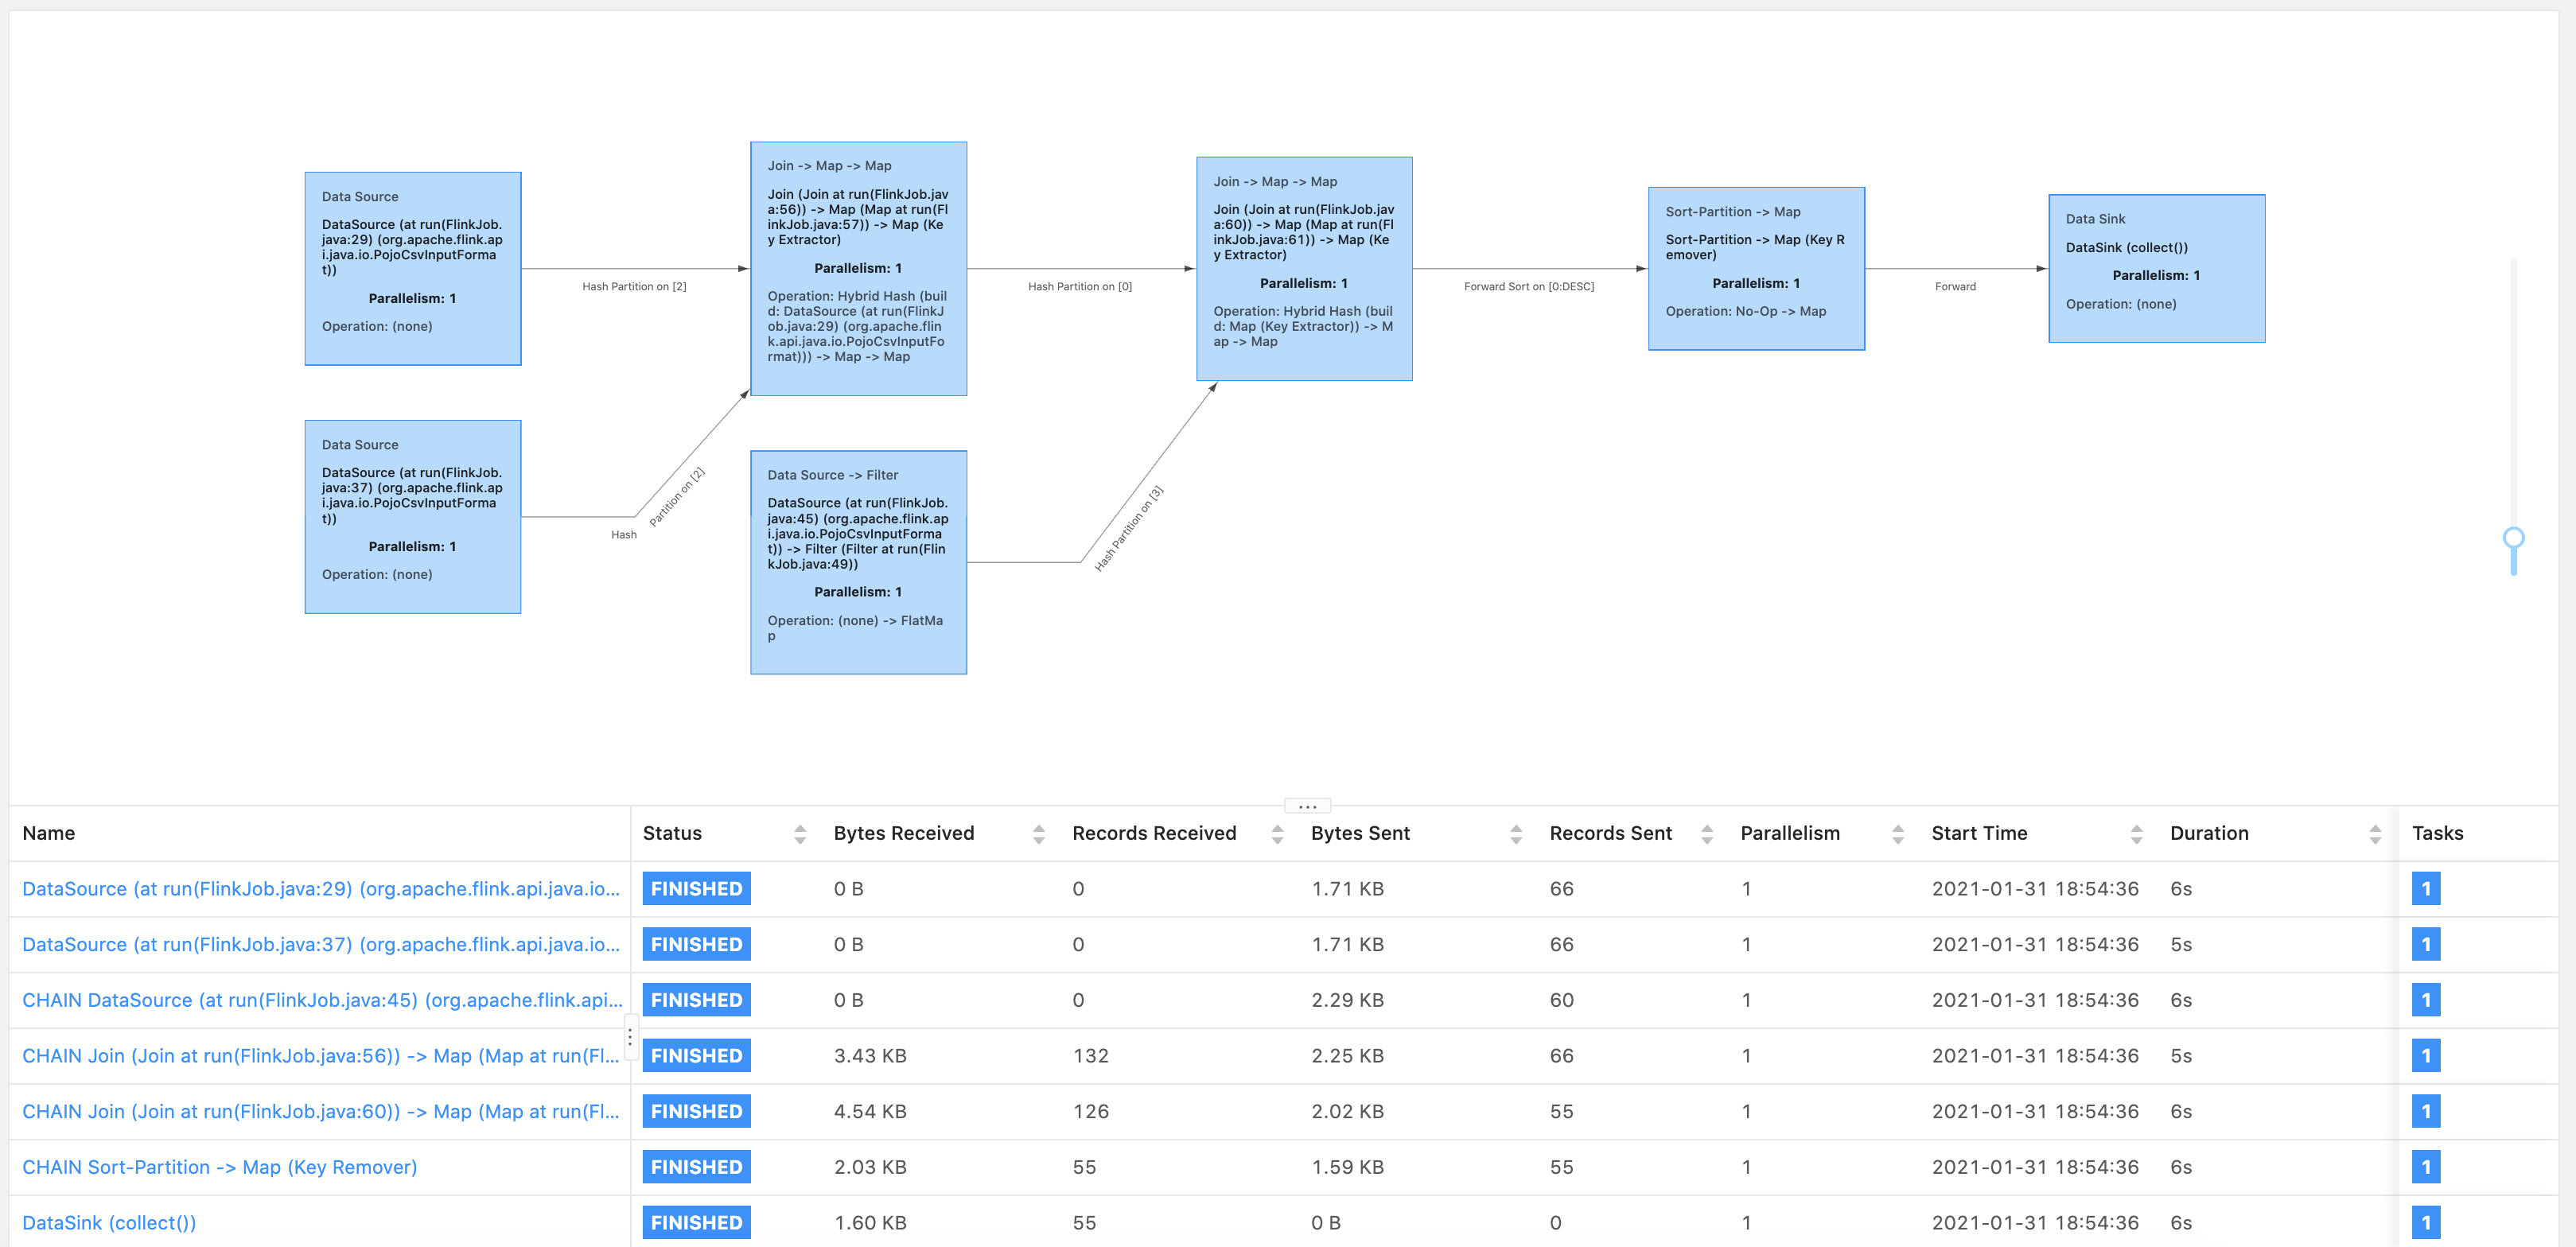
What is pretty cool about Flink is that you have access to a pretty neat dashboard. The screenshot below shows all the different stages on the job we just ran:

We can see all the tasks executed and their duration. Also, the diagram is all interactive which makes things very easy to navigate in case of a complex job.
Data streaming
The DataStream API will let you do all the regular operations on your stream (filtering, updating state, defining windows, aggregating, etc...). Flink provides connectors to interface with the regular streaming services like Apache Kafka and Amazon Kinesis.
Another nice feature available with Flink is its Event Processing library that will detect event patterns so you can focus on what is really important in your event data.
To sum up
Apache Flink released its first API-stable version in March 2016 and it processes data in-memory just like Spark. The big advantage of Flink is its stream processing engine that can also do batch processing. In addition, Flink does very well with memory management and speed (more details on Flink vs Spark).
I recommend opting for Flink as it will do most of the things that Spark does while being way more efficient at processing data streams. Additionally, Flink can be deployed on most common resource providers like Kubernetes and also as a stand-alone cluster on bare-metal hardware. For more real-world use cases and detailed explanations, please read this page from the Flink's website.


